This is the first part of a series of tutorials that aim at to cover all aspects of web development. Each part in this series will build on the previous one, covering topics such as:
We’ll also be covering slightly more advanced topics such as:
Where required I will go into the basics of getting a development environment installed and configured. I will also cover basic design methodologies and best practice.
The Application
To start off we’re going to create a very basic to-do list application, every week we will add new features to it or extend existing ones. These following features will be implemented:
- Save tasks and general information to a MySQL database
- Use jQuery to perform AJAX post-backs
- Add/Edit/Remove a task and save it using AJAX
- Refresh just the task list using AJAX
- Mark tasks as completed using AJAX
- Automatically sort tasks based on due date and priority
- Automatically email a reminder to the user (or attendees) of an up-coming task
- Use CSS animations to show activities
- Use CSS and jQuery to create a responsive design and layout that works on multiple platforms
Once this series is completed you should have a fully functional, database driven, responsive to-do application.
This week we’re going to get a basic wire-frame layout for our screen and start adding some basic styling.
Getting started
To start, we have to define the attributes of our task. This list isn’t final, but it’s a start:
- Task name (string 250 characters, required)
- Date (DateTime, required)
- Priority (numeric 1-5, required)
- Color (string, hex or rgb value)
- Description (string, 1000 characters)
- Attendees (list of email addresses)
As you can see I’ve also specified the data type or a description for each property, this gives me a better idea of what requirements I have. It tells me not only what data type (number, string, etc…) I will need to store it as in the database, but also tells me what controls I can use.
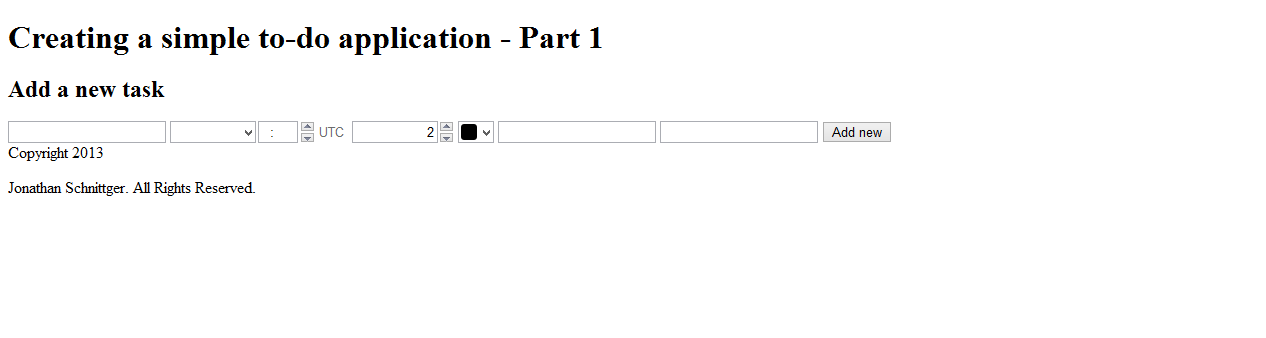
The normal way of getting information in a web page is the using the <form> and <input> elements. In HTML5 several new input types and attributes have been added to make them more useful. Input elements have gained a new attribute ‘required’ and the following new types have been added:
- datetime
- number
- color
These new input types are pretty self explanatory, but their implementation is limited across all browsers. Specifically IE and Firefox are poor, but even Chrome doesn’t support all of them. The best browser for these turns out to be Opera funnily enough (as such all screenshots are from Opera). We’re going to use them, but in certain browsers we’ll have to augment their functionality using jQuery plugins to make the experience consistent (This will be covered in a later tutorial).
Another new feature added in HTML5 is the automatic validation of an inputs value depending on it’s type. For example the new number type must have a numeric value. Using attributes it is possible to set minimum and maximum values, including the step (or how much the value increases in one go)
<input type="number" required min="1" max="5" step="1" value="2">
The form
Now that we know what input types we have available to us we can decide how best to use them.
<form id="add-new-task">
    <input id="new-task-name" name="new-task-name" type="text" required>
    <input id="new-task-date" name="new-task-date" type="datetime" required>
    <input id="new-task-priority" name="new-task-priority" type="number" required min="1" max="5" step="1" value="2">
    <input id="new-task-color" name="new-task-color" type="color">
    <input id="new-task-desc" name="new-task-desc" type="text">
    <input id="new-task-email" name="new-task-email" type="email" multiple>
    <input type="submit" value="Add new">
</form>
As you can see I’ve marked the name, date and priority inputs as required, but I’ve also set the multiple attribute on the email input. This attribute tells the browser that there can be more than one email address in input. These emails will be separated by comma.
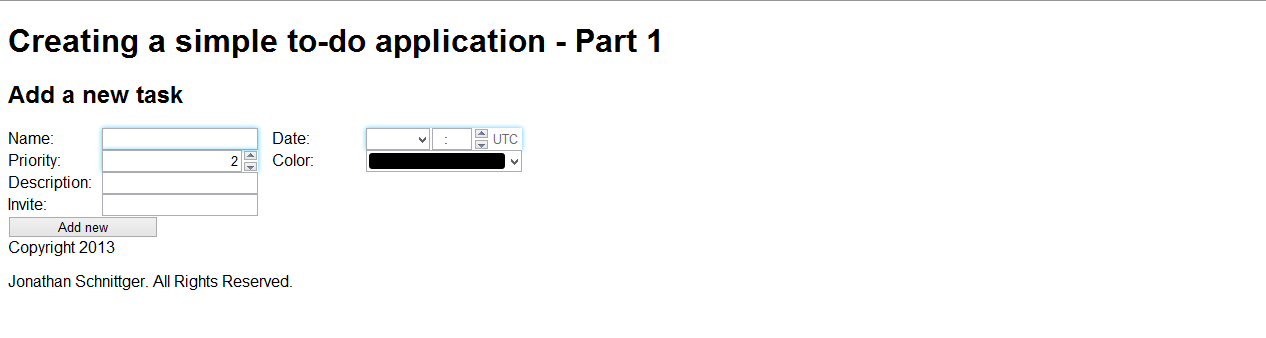
Now lets apply a little structure to our form and add label elements and split out the inputs on to separate rows
<form id="add-new-task">
    <label for="new-task-name">Name:</label>
    <input id="new-task-name" name="new-task-name" type="text" required>
    <label for="new-task-date">Date:</label>
    <input id="new-task-date" name="new-task-date" type="datetime" required>
    <br/>
    <label for="new-task-priority">Priority:</label>
    <input id="new-task-priority" name="new-task-priority" type="number" required min="1" max="5" step="1" value="2">
    <label for="new-task-color">Color:</label>
    <input id="new-task-color" name="new-task-color" type="color">
    <br/>
    <label for="new-task-desc">Description:</label>
    <input id="new-task-desc" name="new-task-desc" type="text">
    <br/>
    <label for="new-task-email">Invite:</label>
    <input id="new-task-email" name="new-task-email" type="email" multiple>
    <br />
    <input type="submit" value="Add new">
</form>
Next up we’re going to apply some basic styling to the page and form.
body {
    color: #000000;
    font-family: "Helvetica Neue", Helvetica, Arial, sans-serif;
}

form#add-new-task label{
    width: 80px;
    display: inline-block;
    margin-right: 10px;
}
form#add-new-task input{
    width: 150px;
    margin-right: 10px;
}
We’re also going to use the :required selector to apply some styling to the inputs that we have marked as required.
form#add-new-task :required {
    border-color: #11b8ff;
    -webkit-box-shadow: 0 0 5px rgba(17, 184, 255, .75);
    -moz-box-shadow: 0 0 5px rgba(17, 184, 255, .75);
    -o-box-shadow: 0 0 5px rgba(17, 184, 255, .75);
    -ms-box-shadow: 0 0 5px rgba(17, 184, 255, .75);
    box-shadow: 0 0 5px rgba(17, 184, 255, .75);
}
This will apply a blue glow to the required inputs
The table
Now that we have a form that will allow us to provide the details of a task, we need somewhere to display them. To do this, we’re going to use a table. I’ve included a basic table below, if you’d like to know more about recent changes to tables please take a look at my previous tutorial on them
<table id="to-do-list">
    <caption>What's up next?</caption>
    <colgroup>
        <col />
        <col />
        <col />
        <col />
        <col />
        <col />
    </colgroup>
    <thead>
        <tr>
            <th scope="col"></th>
            <th scope="col">Date</th>
            <th scope="col">Priority</th>
            <th scope="col">Name</th>
            <th scope="col">Description</th>
            <th scope="col">Invitees</th>
        </tr>
    </thead>
    <tbody>
    </tbody>
</table>
I’ve also re-used the CSS from my previous tutorial on tables
table {
    width: 100%;
}

table, tr, td, thead, tfoot, colgroup, col, caption {
    margin: 0px;
    border-spacing: 0px;
}

table {
    border: 1px solid #333333;
}

table thead tr {
    background-color: #d3edf8;
}

table tbody tr td:last-child, table thead tr th:last-child, table tfoot tr th:last-child {
    text-align: right;
}

table tfoot tr th:first-child {
    text-align: left;
    background-color: #ffffff;
    border-right: 1px solid #333333;
}

table tbody tr td, table tbody tr th, table thead tr th, table thead tr td {
    border-bottom: 1px solid #333333;
    border-top: 0px;
    border-left: 0px;
    border-right: 1px solid #333333;
}

table tbody tr td:last-child, table tbody tr th:last-child, table thead tr th:last-child {
    border-right: 0px;
}

table colgroup col:first-child {
    background-color: #e3edf8;
}

table thead tr th, table tbody tr td {
    padding: 4px 7px 2px;
}

table tbody tr:nth-child(even){
    background-color: #ececec;
}

table tbody tr:nth-child(od){
    background-color: #ffffff;
}
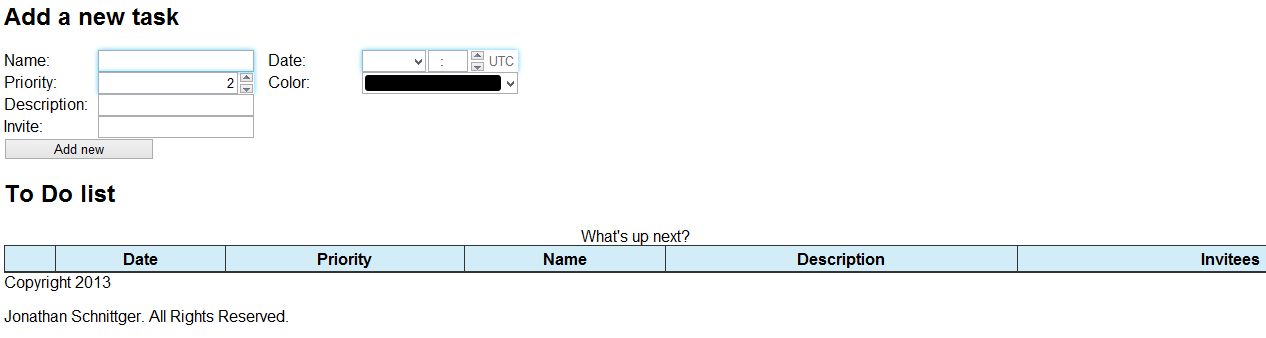
In a later tutorial we’ll expand on this table to add additional controls and functions to it.
jQuery
Now we need a way of adding task to the table. To do this, we’re going use jQuery and create a new row for each task. To include jQuery in our page we’re going to use the following code in our <head> tag
<script src="http://ajax.googleapis.com/ajax/libs/jquery/2.0.0/jquery.min.js"></script>
I’ll cover jQuery in more depth in the next tutorial, so for now I will just cover the basics. jQuery is a javascript library that aims to simplify and add common functionality to websites. It has a simple syntax that allows you to find elements and chain lots of actions or functions together. The element selectors are almost identical to the normal CSS selectors. For example if I wanted to find the form element I would use the following code:
jQuery('form#add-new-task');
If I then wanted to have a function occur when the user submits to the form, I will bind the function to the submit event like this.
jQuery('form#add-new-task').bind('submit', function(event){});
Now when the form is submitted my function will be executed.
Inside this function is where I’m going to put the logic to add the new row to the table for a task. But first we are going to wrap our function in another event. This event will fire once the document or page has finished loading. This prevents the JavaScript from failing as it is executed before the DOM has loaded
jQuery(document).on('ready', function() {
    jQuery('form#add-new-task').bind('submit', function(event){

    });
});
Inside our submit function we’re first going to disable the default action using ‘event.preventDefault();’. Once that is done we need to get our table and its tbody element.
jQuery(document).on('ready', function() {
    jQuery('form#add-new-task').bind('submit', function(event){
        event.preventDefault();

        var tbody = jQuery('#to-do-list > tbody');
    });
});
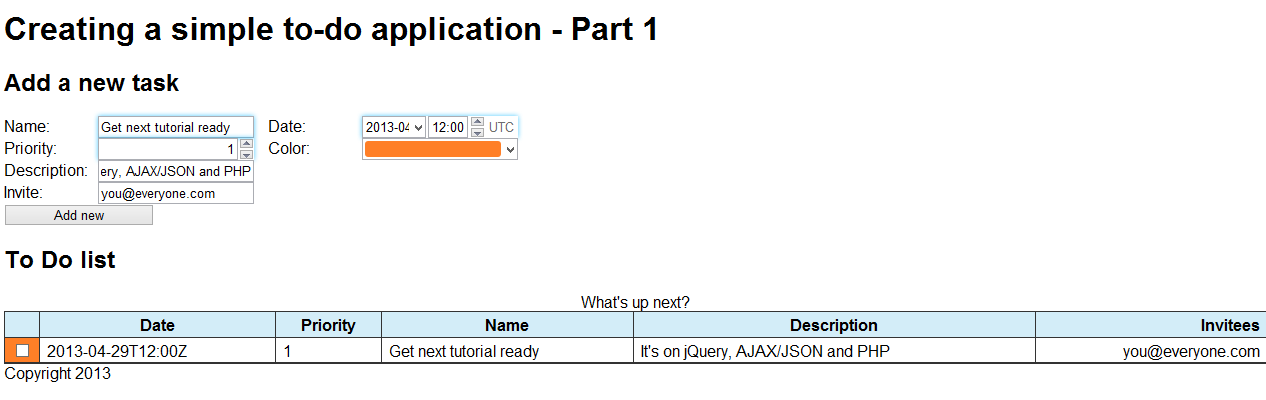
Now that we have our tbody, we need to add a new row to it. We do this using the jQuery append function. We also want to specify the values of the task in the correct columns. We have access to the form element using the ‘this’ keyword.
jQuery(document).on('ready', function() {
    jQuery('form#add-new-task').bind('submit', function(event){
        event.preventDefault();

        var tbody = jQuery('#to-do-list > tbody');

        tbody.append('<tr><th scope="row" style="background-color:' + this['new-task-color'].value +
            '"><input type="checkbox" /></th><td>' + this['new-task-date'].value +
            '</td><td>' + this['new-task-priority'].value + '</td><td>' + this['new-task-name'].value +
            '</td><td>' + this['new-task-desc'].value + '</td><td>' + this['new-task-email'].value + '</td></tr>');

        return false;
    });
});
Now when the user clicks ‘Submit’ a new row will be added to the table.
Next week
Next week we will be turning the form data in to JSON/Xml and using an AJAX post-back to a PHP page. We’ll also be dealing with some of the cross-browser compatibility issues and making the controls behave consistently

