This article will provide a brief tutorial in using HTML, CSS, JavaScript, PHP, and MySQL to build a simple reservation system. It is assumed you are already at least a little familiar with all these technologies, and the real purpose here is just to link them all together to accomplish a common task. It is intentionally over-simplified, because it is aimed at beginners.
Scenario
Let’s suppose our client owns a conference center where people can book rooms for conferences and other events. The system must be able to check for duplicate bookings and warn if there is a conflict. The system is for use only by staff of the conference center. The user must be able to quickly identify availability, preferably with a single glance at the screen.
How we will do it
Because we need to be able to see what is happening at a glance, we’ll divide the screen into two columns. In the left column, we’ll use a large calendar display showing all the days for the current month and we’ll put booking references directly on the calendar so we can see which rooms are booked and when. In the right column, we’ll show more detail for the current week.
For our calendar component, we’re going to use Kevin Ilsen’s excellent Javascript Events Calendar, which despite now being almost old enough to legally buy drinks in Canada, is still one of the best and simplest event calendars you can implement.
Setting up the database
Before we can do anything interesting, we have to do the grunt work of setting up a database that we can connect to for storing and retrieving the reservation data. Fortunately this won’t take long because it is a really simple database that we need to create.
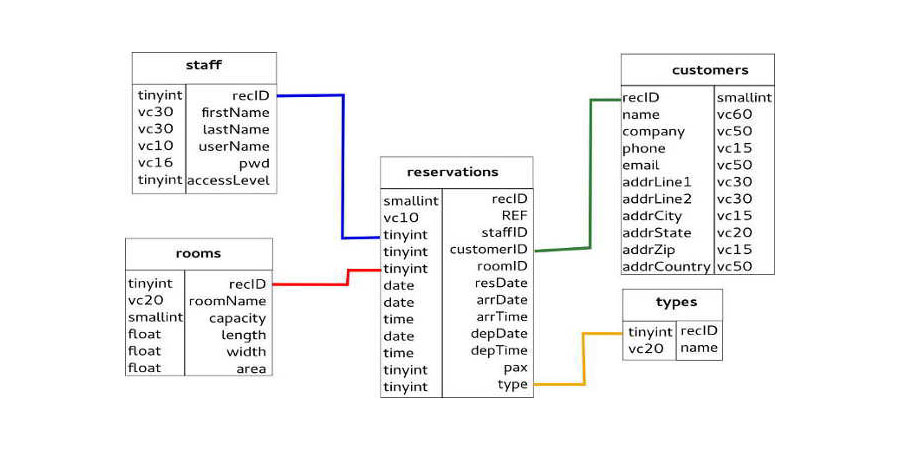
This database design is relatively straightforward. Because its purpose is to record reservations, the Reservations table is right in the center. After creating the database, go to the Staff table and add one user as follows:
firstName = Delete
lastName = Me
userName = delete
pwd = 5baa61e4c9b93f3f0682250b6cf8331b7ee68fd8
accessLevel = 5
This dummy user will be needed for adding at least one real employee with an Access Level of 5 to the database. We’ll get to that in a moment.
Directory structure
The diagram below shows the directory structure used in this project.
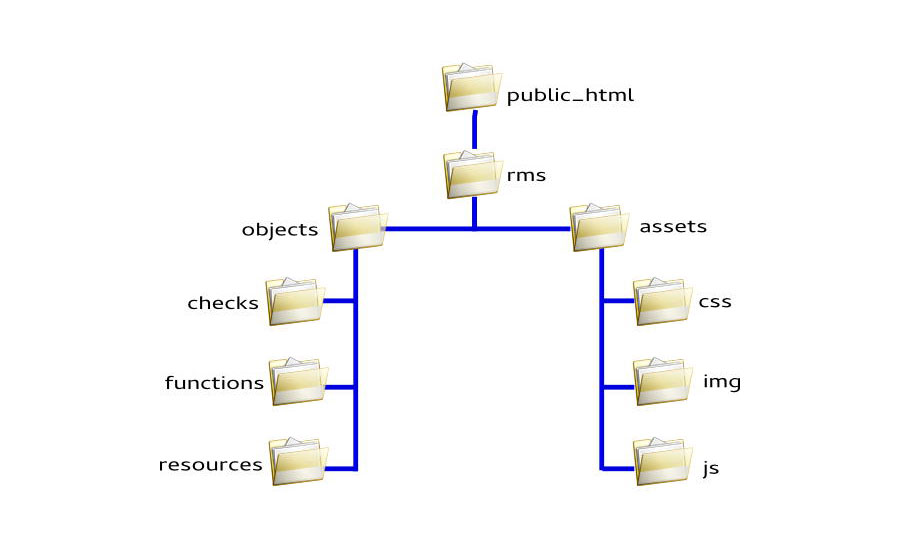
The “assets” folder contains standard website components. The “objects” folder contains PHP code that will be included in the project.
Site structure
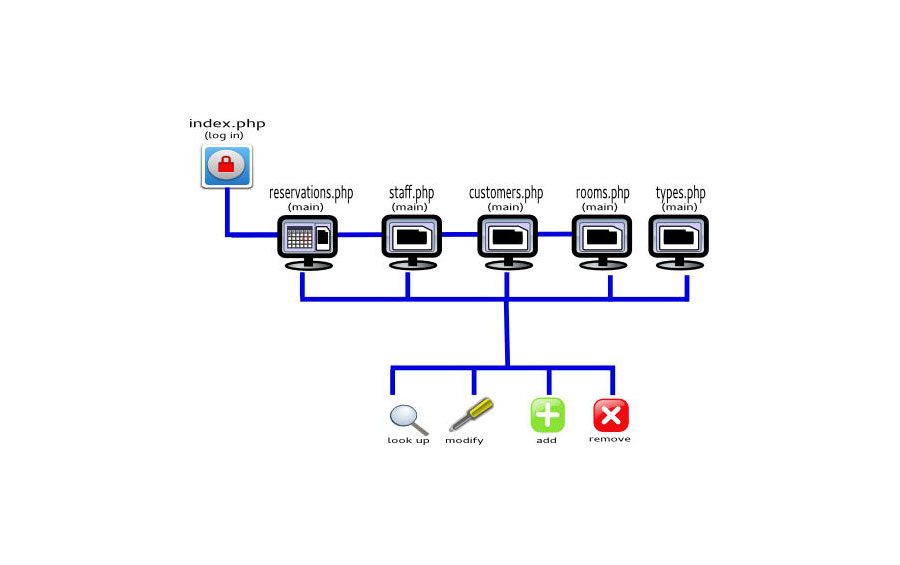
A good website always needs a logical structure. Here’s how it looks in this project:
Page structure
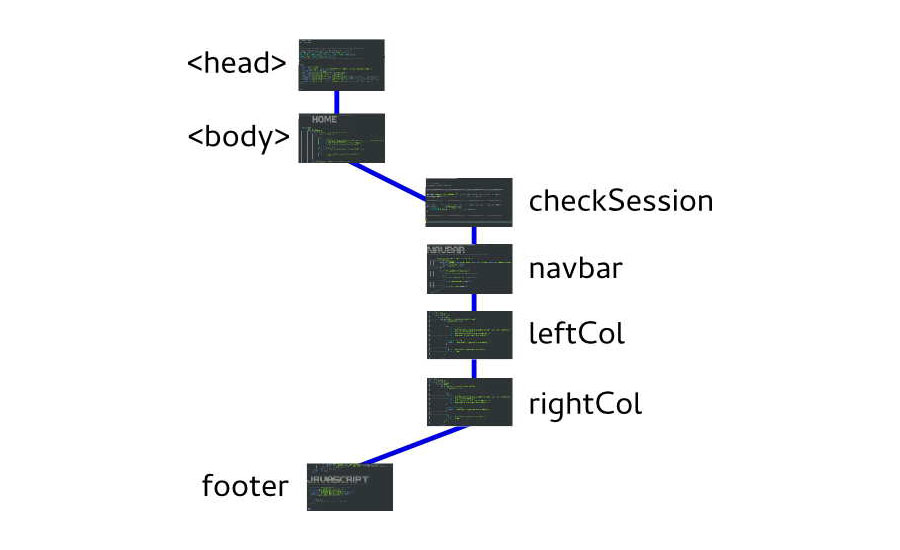
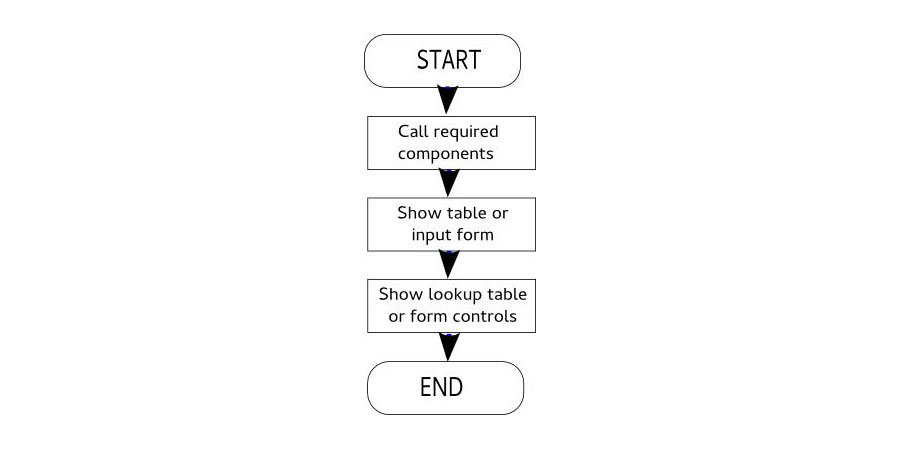
Finally we have the page structure, which is how the PHP components are stacked inside the page.
leftCol and rightCol both have their own components, which can vary depending on what is to be shown.
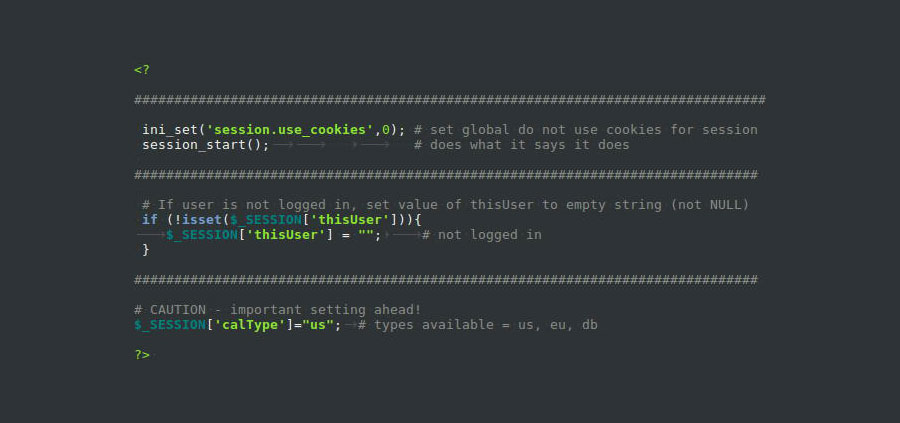
Creating the session check module
This component is used to start or maintain an active PHP session, and also keeps the user logged in once they are logged in.
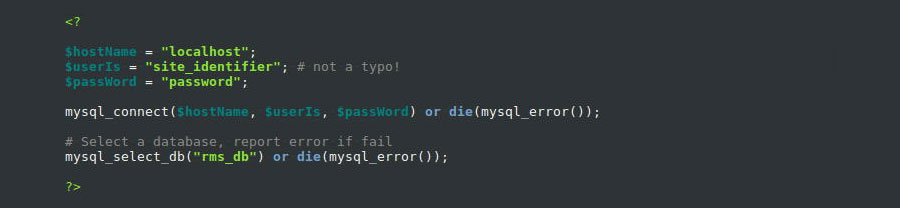
Making the connection to the database
The database connection is located in /objects/resources/connectDB.php
This simply defines the connection string, opens a connection, and then selects the RMS database as the active database. I used $userIs instead of $userID just to ensure there is no naming conflict problem later. Obviously you need to change all the settings here to your real connection string.
Creating the page header
Every HTML document needs a <head> section to define settings for the page that will be displayed. It is located in /objects/resources/pageHeader.php
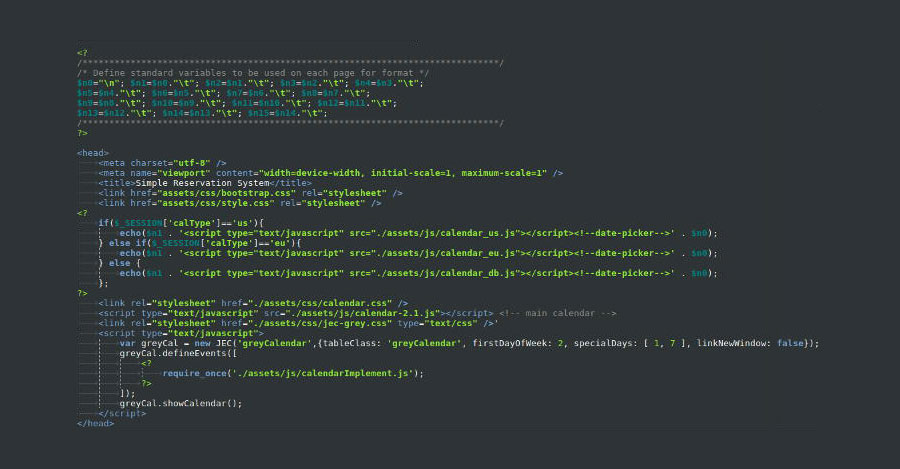
Most of this is just ordinary HTML and there are 2 important sections of PHP code.
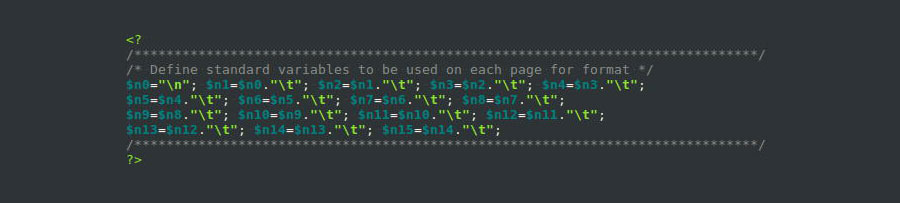
These variables are used throughout the rest of the project. They allow us to “virtually indent” all of the HTML code so that we don’t have to physically indent it. This makes debugging much faster, so it’s a good practice.

Here we choose which datepicker control to use based on the setting you selected in /objects/resources/checkSession.php
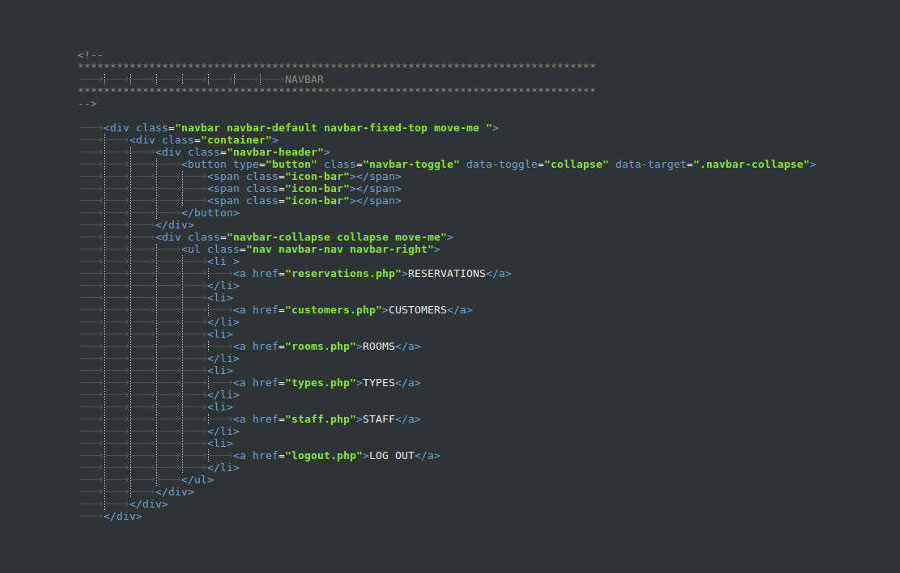
Creating the nav bar
This is a simple Bootstrap nav bar found on every page except the log-in page. It is stored in /objects/resources/navbar.php
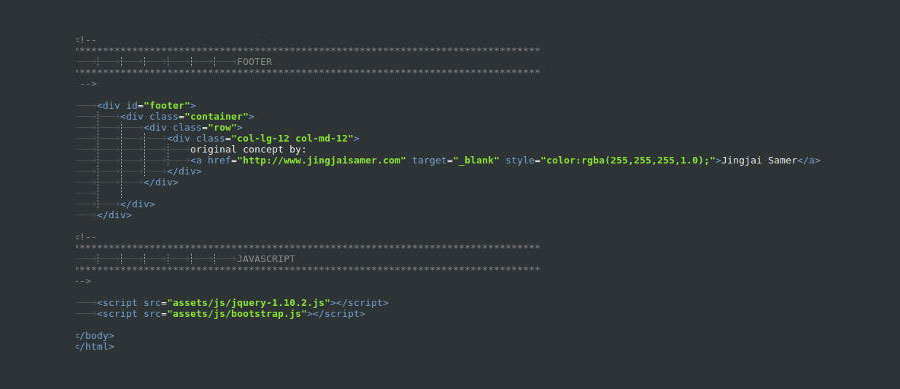
Building the page footer
Just as every page needs a header, it also needs a footer. This just closes off the document.
Building the log-in form
Shown only once per session. This form is located in /objects/resources/frmLogin.php
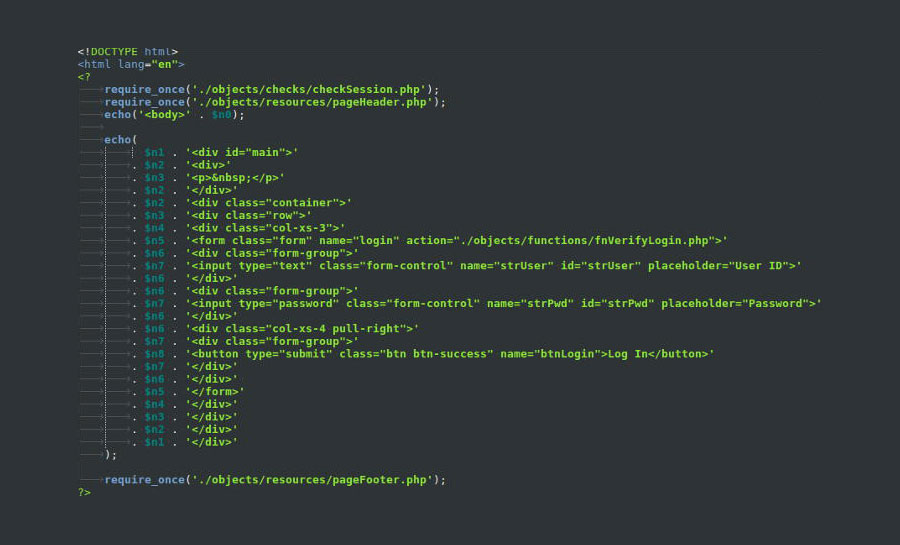
See how those “n” variables work now?
Building the left column
There are two variants: /objects/resources/leftCol_main.php and /objects/resources/leftCol.php. The first is only intended to be used on the main reservations page and includes a lookup form.
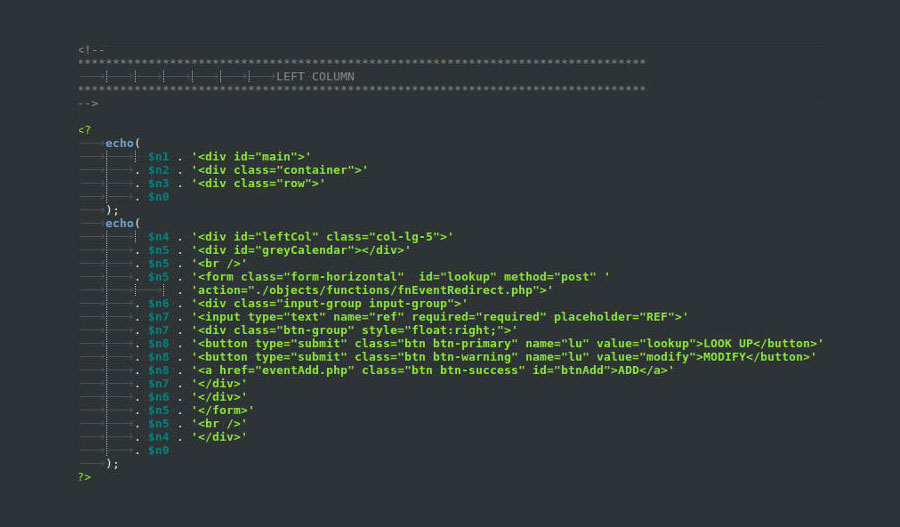
Every other page uses the basic version without a lookup form.
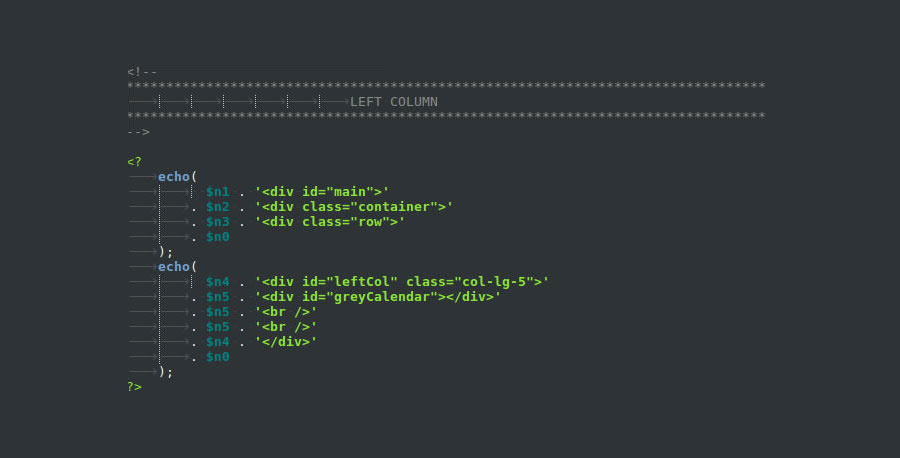
What this actually does is display the JEC calendar that was defined in pageHeader.
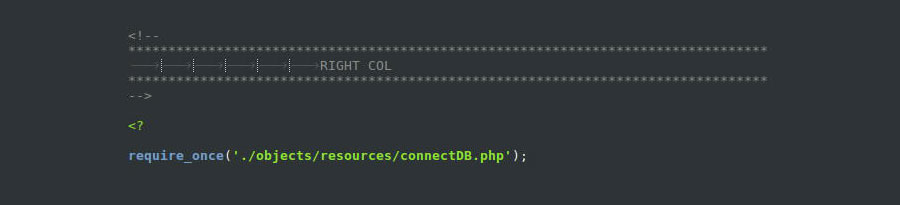
Building the right column
Every page has its own unique version of rightCol, but they all work in basically the same way.
Because the rightCol is very large and complex, we’ll just dissect the simplest one (rightCol_types) and you should be able to figure out how all the others work based on that.
First, the component call. In this case (as in most others) it is simply calling the database connection.
Next we start a table.
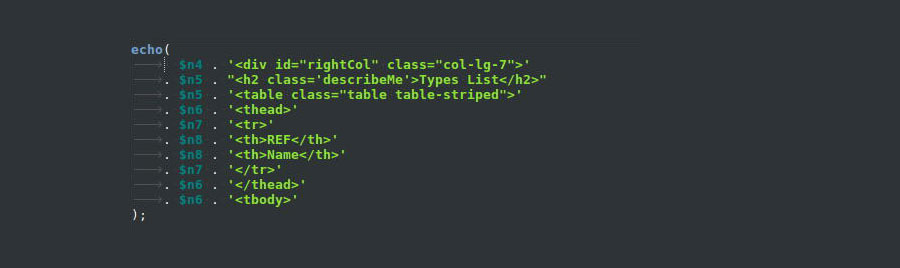
Then define a SQL query.

With that, we can populate our table. The thisRow variable is used to detect an empty dataset.
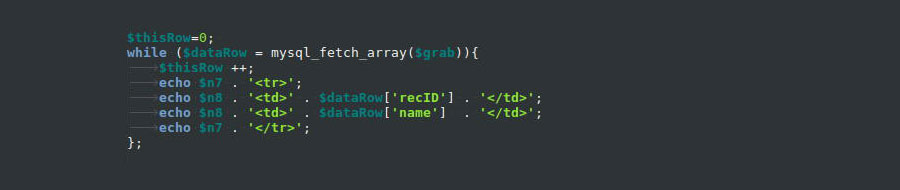
If no data was returned, then thisRow will still be 0. We need to handle that.

Now we finish up the table and add some white space under it.

Most of the time, we’ll also provide a lookup form for tables, but in this case we restrict editing functions only to users with access level above 3.
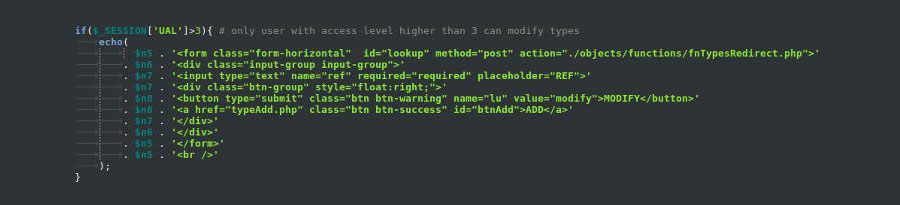
Then all that’s left to do is tidy up.

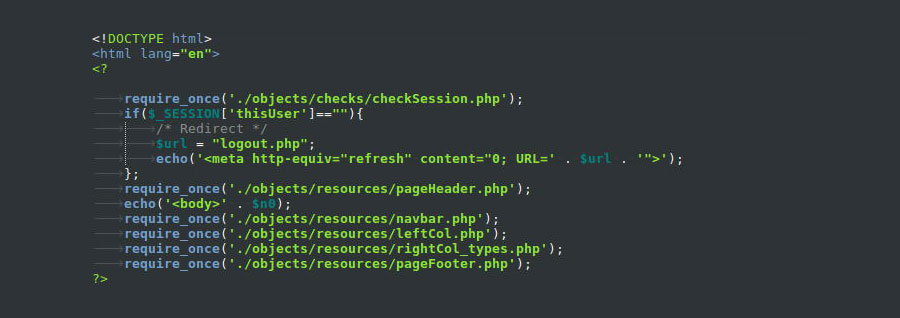
Putting it all together
Now we need to link all these different parts together so that the page functions.
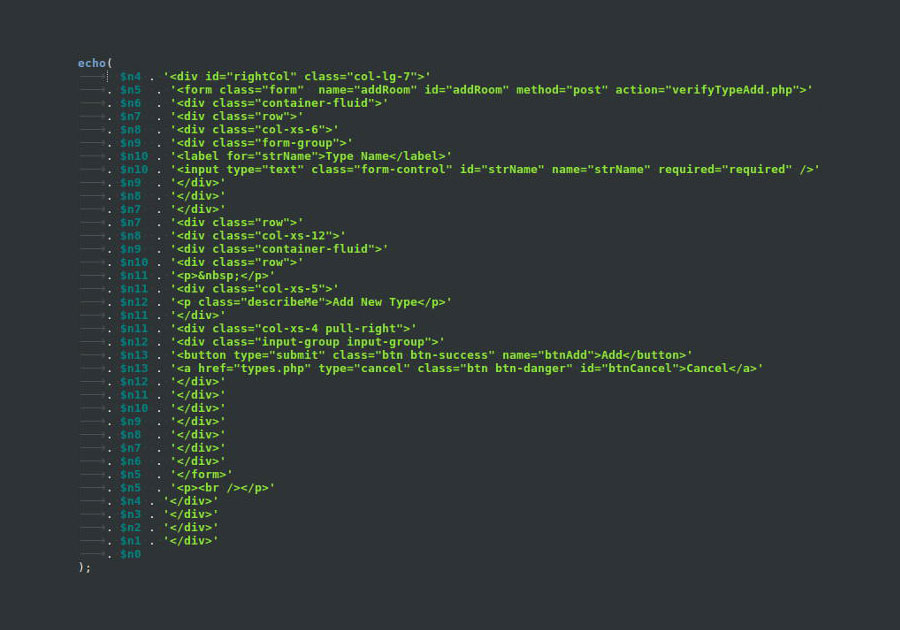
Right column for adding or modifying records
The above covered displaying records in a table, but to add or modify records we need to use forms.
Final Steps
The rest of the application is very easy to understand and should not require in-depth discussion provided you understand everything that was done in the above steps.
Now to make this a working system, you need to change database connection string information in /objects/resources/connectDB.php or the program will fail. Also change the calType session variable in /objects/checks/checkSession.php to whatever is correct for your location – “us” for countries that use m-d-y format, and “eu” for other countries. You can also use “db” to use the more natural y-m-d format.
Then simply open the application by connecting to the server where you stored it, and log in as delete using password for the password.
Immediately go to the Staff page and type 1 in the REF box. Then click MODIFY and edit the details of user “Delete Me” to your own name, user name, and password. After that, the application will work as a functioning system.