The release of HTML5 introduced native Drag and Drop functionality to modern web-browsers. This means it is now possible to have movable elements on screen without the aid of frameworks like jQuery. This week we’ll be taking advantage of the drag and drop functionality to create a basic shopping cart. The basic functionality we’ll cover, will be adding an item to the cart and if it already exists updating the quantity and totals.
Getting Started
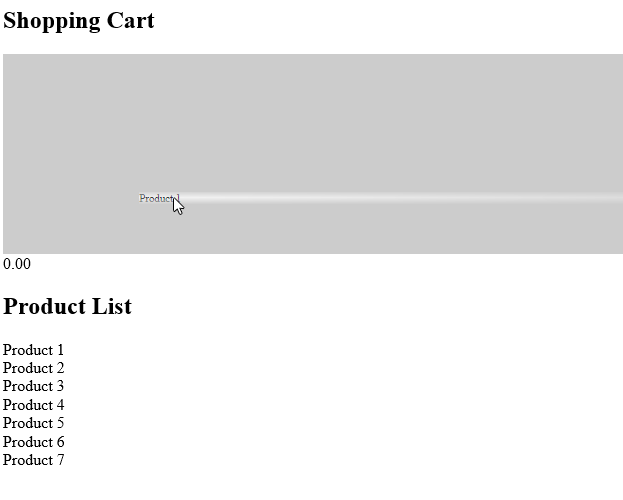
The first thing we’ll need is a basic structure for our cart and a list of products. To the product list, on each item I’m going to add a custom data-* attribute for the price. The data-* attributes allow us to store named data for a specific element. We’ll be using more of them later on in this tutorial.
<section id="cart" class="shopping-cart">
    <ul>
    </ul>
    <span class="total">0.00</span>
</section>
<section id="products" class="products">
    <ul>
        <li id="product-1" data-price="2.00"><span>Product 1</span></li>
        <li id="product-2" data-price="3.00"><span>Product 2</span></li>
        <li id="product-3" data-price="2.99"><span>Product 3</span></li>
        <li id="product-4" data-price="3.50"><span>Product 4</span></li>
        <li id="product-5" data-price="4.25"><span>Product 5</span></li>
        <li id="product-6" data-price="6.75"><span>Product 6</span></li>
        <li id="product-7" data-price="1.99"><span>Product 7</span></li>
    </ul>
</section>
Making Life Easy
Since this is a pure JavaScript tutorial, we won’t have access to the event shortcuts of jQuery (or other frameworks). To make life easier I’m going to use a addEvent function to make adding events quicker and easier.
function addEvent(element, event, delegate ) {
    if (typeof (window.event) != 'undefined' && element.attachEvent)
        element.attachEvent('on' + event, delegate);
    else
        element.addEventListener(event, delegate, false);
}
The first event that we are going to use is the readystatechange event. This event gets triggered when the document state changes, we’re going to wait until the state is set to “complete” before attaching the rest of events and logic. This is roughly equivalent to the jQuery .ready event
addEvent(document, 'readystatechange', function() {
    if ( document.readyState !== "complete" )
        return true;
});
Querying The DOM
Along with the introduction of HTML5, the DOM selectors API was also updated. One of the most useful methods added is the querySelectorAll. This method allows you to use more complex CSS style selectors (like jQuery) to query elements. It’s much simpler to use than the older class and ID get functions.
var items = document.querySelectorAll("section.products ul li");
var cart = document.querySelectorAll("#cart ul")[0];
Here I am caching the product list items and the shopping cart list for use later on. As you can see the querySelectorAll function has made this much easier. Now that I have a list of products, I’ll have to make the draggable and add an event to setup some data when a product is dragged. To do this, I’m going to iterate through the items list and use the setAttribute method to set the draggable attribute to true. At this point I’m also going to add the dragstart event to each item.
for (var i = 0; i < items.length; i++) {
    var item = items[i];
    item.setAttribute("draggable", "true");
    addEvent(item, 'dragstart', onDrag);
};
Here you can see that I have specified the function for dragstart as onDrag. The purpose of this function is to set the drag options and store the element id for later retrieval usinh the dataTransfer.setData. The event.dataTransfer object allows me to specify the default effects for the drag action. By default it is both copy and move, but here I have forced it to be move only.
function onDrag(event){
    event.dataTransfer.effectAllowed = "move";
    event.dataTransfer.dropEffect = "move";
    var target = event.target || event.srcElement;
    var success = event.dataTransfer.setData('Text', target.id);
}
Setting Up The Cart Drop Area
By default elements do not accept drop events, so to actually enable an element receive a drop event we must override the default behavior. To do this, I’m using a function called onDragOver. All this does is prevent the default event behavior of dragover and dragenter
function onDragOver(event){
    if(event.preventDefault) event.preventDefault();
    if (event.stopPropagation) event.stopPropagation();
    else event.cancelBubble = true;
    return false;
}
addEvent(cart, 'dragover', onDragOver);
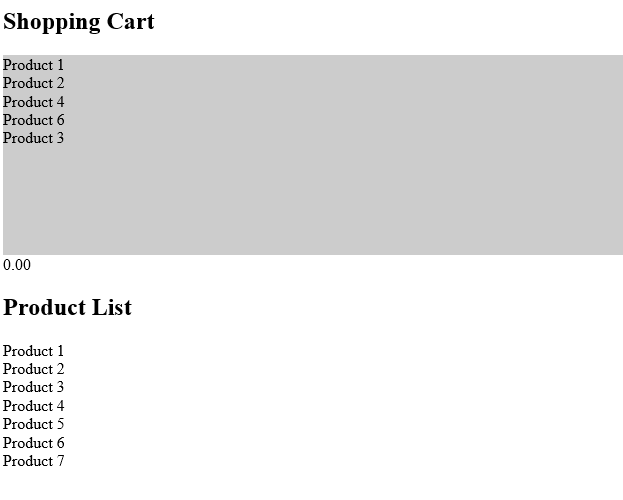
Adding Items To The Cart
Now that the cart list is setup to receive the drop events, we can create our onDrop function. Once again the first thing we need to do is prevent the default event behavior, once this is done we simply pull out the id value from the dataTransfer object using the dataTransfer.getData function this time. Using the Id, we can now find the product in the product list.
Before we add a new product to the cart, we must first check to see if it has already been added to the cart. I mentioned earlier that we would be using some more data-* attributes, the product id is the next one we’ll be using. To check to see if the product already exists we use the querySelectorAll function again, this time specifying an attribute based selector, providing the product id as a value to it.
var exists = document.querySelectorAll("#cart ul li[data-id='" + id + "']");
Now we can see if the the product is already in the cart by using the .length property.
if(exists.length > 0){
    updateCartItem(exists[0]);
} else {
    addCartItem(item, id);
}
If the cart does not contain this product, the first thing the addCartItem function must do is clone the current list item. Now we can start setting specific data-* values. The first one we add is the data-d attribute, this is going to be the element id from above. Next, we set the quantity to 1 and remove the id attribute (as it must be unique on the page). We’re also going to add 2 new span elements to the list item. These will be the display elements for the quantity and sub-total for this product.
function addCartItem(item, id) {
    var clone = item.cloneNode(true);
    clone.setAttribute('data-id', id);
    clone.setAttribute('data-quantity', 1);
    clone.removeAttribute('id');

    var fragment = document.createElement('span');
    fragment.setAttribute('class', 'quantity');
    fragment.innerHTML = ' x 1';
    clone.appendChild(fragment);

    fragment = document.createElement('span');
    fragment.setAttribute('class', 'sub-total');
    clone.appendChild(fragment);
    cart.appendChild(clone);
}
Updating Items In The Cart
If an item already exists in the cart, we will need to increment the quantity by 1 and update the quantity display value. Using the getAttribute function we can recover our current quantity and then increment it and update out quantity span element.
function updateCartItem(item){
    var quantity = item.getAttribute('data-quantity');
    quantity = parseInt(quantity) + 1
    item.setAttribute('data-quantity', quantity);
    var span = item.querySelectorAll('span.quantity');
    span[0].innerHTML = ' x ' + quantity;
}
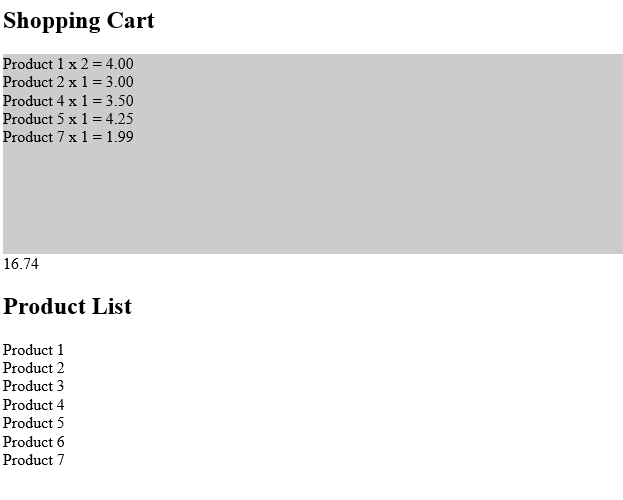
Updating The Totals
Once the quantities have been updated, we now need to re-calculate the total values. Once again using the querySelectorAll function, we select out the list items in the cart and then for each one calculate its sub-total. Here I’m using the parseFloat function to ensure that we don’t lose any decimal place values. Before I update the display values I use the toFixed function to limit the number of decimal places to 2.
function updateCart(){
    var total = 0.0;
    var cart_items = document.querySelectorAll("#cart ul li")
    for (var i = 0; i < cart_items.length; i++) {
        var cart_item = cart_items[i];
        var quantity = cart_item.getAttribute('data-quantity');
        var price = cart_item.getAttribute('data-price');

        var sub_total = parseFloat(quantity * parseFloat(price));
        cart_item.querySelectorAll("span.sub-total")[0].innerHTML = " = " + sub_total.toFixed(2);

        total += sub_total;
    }

    document.querySelectorAll("#cart span.total")[0].innerHTML = total.toFixed(2);
}
Finishing Up
And there you have it, a simple dynamic shopping cart. I’ve deliberately left out removing items in the shopping cart for you to give it a try on your own. It’s not difficult and there are several ways for you to try it. Just remember to call updateCart at the end to make sure the totals are always right!
The final JavaScript should look something like this:
function addEvent(element, event, delegate ) {
    if (typeof (window.event) != 'undefined')
        element.attachEvent('on' + event, delegate);
    else
       element.addEventListener(event, delegate, false);
}

addEvent(document, 'readystatechange', function() {
    if ( document.readyState !== "complete" )
        return true;

    var items = document.querySelectorAll("section.products ul li");
    var cart = document.querySelectorAll("#cart ul")[0];

    function updateCart(){
        var total = 0.0;
        var cart_items = document.querySelectorAll("#cart ul li")
        for (var i = 0; i < cart_items.length; i++) {
            var cart_item = cart_items[i];
            var quantity = cart_item.getAttribute('data-quantity');
            var price = cart_item.getAttribute('data-price');

            var sub_total = parseFloat(quantity * parseFloat(price));
            cart_item.querySelectorAll("span.sub-total")[0].innerHTML = " = " + sub_total.toFixed(2);

            total += sub_total;
        }

        document.querySelectorAll("#cart span.total")[0].innerHTML = total.toFixed(2);
    }

    function addCartItem(item, id) {
        var clone = item.cloneNode(true);
        clone.setAttribute('data-id', id);
        clone.setAttribute('data-quantity', 1);
        clone.removeAttribute('id');

        var fragment = document.createElement('span');
        fragment.setAttribute('class', 'quantity');
        fragment.innerHTML = ' x 1';
        clone.appendChild(fragment);

        fragment = document.createElement('span');
        fragment.setAttribute('class', 'sub-total');
        clone.appendChild(fragment);
        cart.appendChild(clone);
    }

    function updateCartItem(item){
        var quantity = item.getAttribute('data-quantity');
        quantity = parseInt(quantity) + 1
        item.setAttribute('data-quantity', quantity);
        var span = item.querySelectorAll('span.quantity');
        span[0].innerHTML = ' x ' + quantity;
    }

    function onDrop(event){
        if(event.preventDefault) event.preventDefault();
        if (event.stopPropagation) event.stopPropagation();
        else event.cancelBubble = true;

        var id = event.dataTransfer.getData("Text");
        var item = document.getElementById(id);

        var exists = document.querySelectorAll("#cart ul li[data-id='" + id + "']");

        if(exists.length > 0){
            updateCartItem(exists[0]);
        } else {
            addCartItem(item, id);
        }

        updateCart();

        return false;
    }

    function onDragOver(event){
        if(event.preventDefault) event.preventDefault();
        if (event.stopPropagation) event.stopPropagation();
        else event.cancelBubble = true;
        return false;
    }

    addEvent(cart, 'drop', onDrop);
    addEvent(cart, 'dragover', onDragOver);

    function onDrag(event){
        event.dataTransfer.effectAllowed = "move";
        event.dataTransfer.dropEffect = "move";
        var target = event.target || event.srcElement;
        var success = event.dataTransfer.setData('Text', target.id);
    }


    for (var i = 0; i < items.length; i++) {
        var item = items[i];
        item.setAttribute("draggable", "true");
        addEvent(item, 'dragstart', onDrag);
    };
});
You can see the demo here, I’ve included some very (very) basic CSS just to highlight the 2 sections so it’s a little basic

