Have you ever started filling out a form or blog post only to have your session to expire or your browser to crash losing all of your work in the process? HTML5 introduced the concept of browser storage mechanisms. HTML5 storage has the ability to store string values in either local or session variables. The localStorage variable can persists across sessions and can be of any size. This behavior is similar to a cookie, however it does not suffer from the same limitations.
In this tutorial we’ll be utilizing the localStorage mechanism to store the current state of a form. This means that when the page is reloaded or the user re-opens the page after closing it the form will be populated with the previous values. For improved complexity, we’ll be storing the data as serialized JSON strings.
Getting Started
To get started we’ll need to create our jQuery plugin wrapper. As always, this allows us to pass in parameters, define default settings and maintain chain-ability
(function ( $ ) {
    $.fn.FormCache = function( options ) {
        var settings = $.extend({
        }, options );

        return this.each(function() {
            var element = $(this);
        });
    };
}( jQuery ));
Once we have this, the first thing we need to do confirm that the browser supports the new HTML5 storage functionality. To do this, we simply verify that the Storage class is defined correctly. We’ll do this in the return .each function of the plugin wrapper. It should be noted at this point, that some browsers do not enable local storage for file:// based URIs, you’ll need to have this running on your web server to test this properly.
if(typeof(Storage)!=="undefined"){
} else {
    alert('local storage is not available');
}
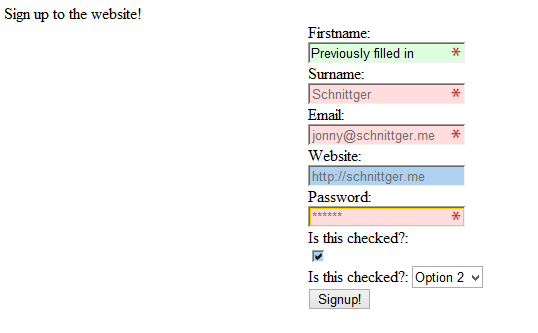
I’m using a slightly modified version of the Sign Up form HTML from last weeks introduction to HTML5 form validation available here
<form name="signup-form">
    <label for="firstname">Firstname:</label>
    <input id="firstname" name="firstname" type="text" title="Please enter your firstname" placeholder="Jonny" autofocus required />

    <label for="surname">Surname:</label>
    <input id="surname" name="surname" type="text" title="Please enter your surname" placeholder="Schnittger" required />

    <label for="email">Email:</label>
    <input id="email" name="email" type="email" title="Please enter your email address" placeholder="jonny@schnittger.me" required />

    <label for="website">Website:</label>
    <input id="website" name="website" type="url" title="Please enter the url to your website (optional)" placeholder="http://schnittger.me" />

    <label for="password">Password:</label>
    <input id="password" name="password" type="password" title="Please enter a password, it must contain at least 1 lowercase and 1 uppercase character and be at least 6 characters in length" pattern="^.*(?=.{6,})(?=.*[a-z])(?=.*[A-Z]).*$" placeholder="******" required />

    <label for="checkbox">Is this checked?:</label>
    <input id="checkbox" name="checkbox" type="checkbox" checked />

    <label for="checkbox">Is this checked?:</label>
    <select id="options" name="options">
        <option value="opt-1">Option 1</option>
        <option value="opt-2">Option 2</option>
        <option value="opt-3">Option 3</option>
        <option value="opt-4">Option 4</option>
    </select>


    <input type="submit" value="Signup!" />

</form>
Initializing Our Storage
Now that we have confirmed that the browser supports local storage, the first thing we need to do is create a key that we will store our data against. For this I’m using the form Name attribute, but you could just as easily use the ID attribute. Next up, we check to see if the localStorage object already contains a value for our key. If it does, we’re going to use the JSON.parse function to automatically parse the current value. If the data does not serialize or is not set, we will initialize it using the JSON.stringify function.
var key = element.attr('name');

var data = false;
if(localStorage[key]) {
    data = JSON.parse(localStorage[key]);
}

if(!data) {
    localStorage[key] = JSON.stringify({});
    data = JSON.parse(localStorage[key]);
}
Caching Our Form Values
To actually save our form values to the localStorage we’ll need to know when they are changed. To do this we use the jQuery .change event. We’ll bind the .change event to a function called on_change, just after we have initialized our storage.
element.find('input, select').change(on_change);
Our on_change function will take one parameter, the jQuery event object. From the event object we’ll use the .target property to get the form element that has changed. We will then identify it’s parent form using .parents and get its name to recover our initialized JSON string from localStorage. Radio and Checkbox elements don’t use the standard value attribute, so to correctly determine if they are checked, we’ll use the .is function. For the other inputs we’ll just use .val as normal.
Once we have our update data object, we need to convert it back in to a string using JSON.stringify and update the localStorage object.
function on_change(event) {
    var input = $(event.target);
    var key = input.parents('form:first').attr('name');
    var data = JSON.parse(localStorage[key]);

    if(input.attr('type') == 'radio' || input.attr('type') == 'checkbox') {
        data[input.attr('name')] = input.is(':checked');
    }else {
        data[input.attr('name')] = input.val();
    }

    localStorage[key] = JSON.stringify(data);
}
Populating Out Cached Form Values
Now that we have the ability to cache the form values, we’ll need to pull them back out at load time and automatically fill out the form values. To do this, we simply go through each element an depending on it’s type either set the value using .val or specify the attribute checked for radio or checkbox elements. To make sure that a radio or checkbox element is not checked by default, we simply remove the checked attribute using .removeAttr
The Final Plugin
If you’ve followed the above steps, you should have something that looks like this
(function ( $ ) {
    $.fn.FormCache = function( options ) {
        var settings = $.extend({
        }, options );

        function on_change(event) {
            var input = $(event.target);
            var key = input.parents('form:first').attr('name');
            var data = JSON.parse(localStorage[key]);

            if(input.attr('type') == 'radio' || input.attr('type') == 'checkbox') {
                data[input.attr('name')] = input.is(':checked');
            }else {
                data[input.attr('name')] = input.val();
            }

            localStorage[key] = JSON.stringify(data);
        }

        return this.each(function() {
            var element = $(this);

            if(typeof(Storage)!=="undefined"){
                var key = element.attr('name');

                var data = false;
                if(localStorage[key]) {
                    data = JSON.parse(localStorage[key]);
                }

                if(!data) {
                    localStorage[key] = JSON.stringify({});
                    data = JSON.parse(localStorage[key]);
                }
                element.find('input, select').change(on_change);

                element.find('input, select').each(function(){
                    if($(this).attr('type') != 'submit') {
                        var input = $(this);
                        var value = data[input.attr('name')];
                        if(input.attr('type') == 'radio' || input.attr('type') == 'checkbox') {
                            if(value) {
                                input.attr('checked', input.is(':checked'));
                            } else {
                                input.removeAttr('checked');
                            }
                        } else {
                            input.val(value);
                        }
                    }
                });


            }
            else {
                alert('local storage is not available');
            }
        });
    };
}( jQuery ))
Using The Plugin
To start using the plugin, all we need to do is call it using the usual document ready function and a simple form selector.
$(document).ready(function(){
    $('form').FormCache();
});
This plugin doesn’t currently take in any settings, you could modify it to take in default values for a form, or to enable a timestamp value to invalidate the data after a set period of time.

