Once upon a time, someone decided to see what would happen if you merged a powerful open source PHP framework with a drag‘n’drop content editor designed for non-technical users. As it turns out, you get ImpressPages.
ImpressPages began as more traditional CMS, with an emphasis on user-friendliness. The content editor was also drag‘n’drop, but I recall that the rest of the interface seemed confusing to me. It seemed as though they were trying to cram in everything anyone might need in a CMS, and it showed.
That’s all changed. The admin interface is a lot easier to figure out, and the whole package just seems lighter by default. And yet, it’s far more powerful, because it’s a fully-fledged framework. You can build just about anything you can imagine with it.
At the same time, it’s easy enough for someone like me to build a basic website with it. I’m not a developer, as such; I have a handle on HTML and CSS, some very basic programming logic, jQuery, and a lot of WordPress-specific PHP functions; that’s all I got, I wouldn’t know an algorithm if it bit me on the behind. So when a tool this powerful and flexible doesn’t demand programming expertise before it becomes useful, I take notice.
In this article, I’m going to demonstrate how to integrate ImpressPages with a simple, one-page website template, for use as a basic CMS.
The setup
When I write stuff like this, I try to pretend I’m being realistic about it. So, I put together a very generic, very non-specific, practically empty template for this one-page portfolio site. I populated it with top-notch marketing content, as you can see in the screenshot below:
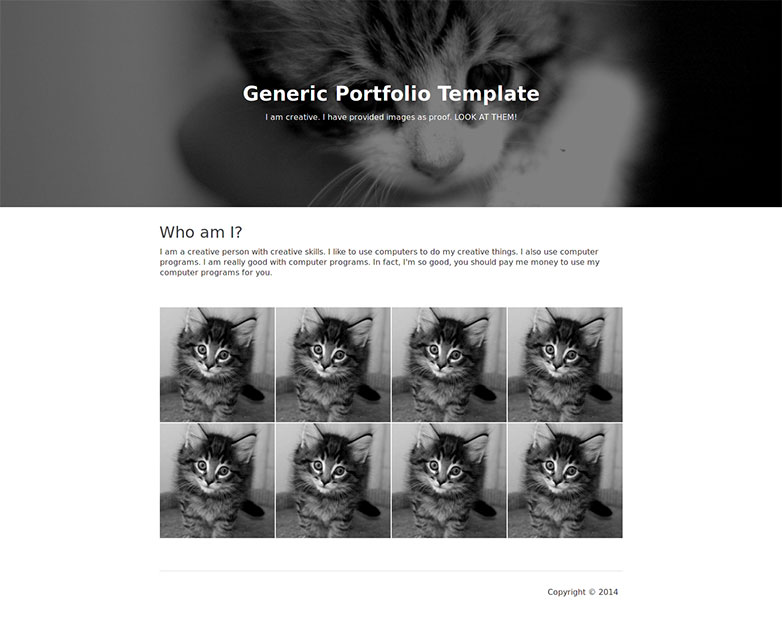
Yes, it’s quick, and it’s dirty. The only reason it looks as good as it does is because I built it with a framework called Base, as anyone who wants to save time might do.
So we end up with these goals: One: make it work. Two: use coding logic based on the framework to do it. This is not the easiest thing to do, because, as you might expect, ImpressPages generates a whole lot of its own HTML. I don’t know any way to customize that HTML, short of going into the source and changing it yourself.
This is more or less the price we pay for drag ‘n’ drop content editing. If you want lean, completely customizable HTML, there are other options out there.
Step one: Install ImpressPages
This part is simple and straightforward. The requirements are basically the same as for WordPress: server, PHP, MySQL database. The installer will check to make sure that certain directories within the CMS itself are writable, and if they aren’t, it’ll ask you to fix that before continuing.
Once you’ve got it installed, and you’ve logged in, familiarize yourself with the content editor, and the page management interface. They are simple enough.
Step two: Organize your theme files
ImpressPages themes are typically set up a bit like this:
- Theme Name / Directory
-- assets
---- style.css
---- script.js
-- setup
--- theme.json
--- thumbnail.png
--- options.js (optional)
-- main.php
main.phpis your primary template file. This is what will typically be used for the home page. For our one-page website, it’s the only template file.
On larger sites, you can also call in includes, to be re-used on as many pages as you like. These includes can contain editable regions just like pages, and the changes you make in those editable regions will be reflected throughout the entire website.
Step three: Tell ImpressPages about your theme
theme.jsonis an indispensable file. It tells ImpressPages all about your theme, and passes it a few important options. This next example comes from QuickStart, a theme that is included in every ImpressPages installation:
{
    "title": "Quick Start",
    "version": "2.00",
    "doctype": "HTML5", /* HTML5, XHTML1_STRICT, XHTML1_TRANSITIONAL, XHTML1_FRAMESET, HTML4_STRICT, HTML4_TRANSITIONAL, HTML4_FRAMESET  */
    "thumbnail": "thumbnail.png",
    "author": "ImpressPages",
    "widget": { /* Image cropping settings for widgets. Require theme reinstall to take effect. */
        "image": {
            "width": 540,
            "height": 342
        },
        "imageGallery": {
            "width": 160,
            "height": 100
        }
    }
}
The options are pretty self-explanatory, so I won’t go stating the obvious. Still, it strikes me as interesting that they have you declare the Doctype, and that you pull that info in at the top of each template, as opposed to simply hard-coding it in. I suspect that this variable has more to do with ImpressPages’ theme marketplace than any actual functionality. Just sayin’.
On the other hand, I definitely like that they give you an easy way to define thumbnail sizes for those two widgets.
Step four: Include the essentials
You don’t need to do much to make your template work, but you do need to include a couple of essential lines of code. Basically, these will call in the necessary files to make the admin UI work, since the admin UI is tightly connected to the front-end.
The top of your theme file will look something like this:
<?php echo ipDoctypeDeclaration(); ?>
<html <?php echo ipHtmlAttributes(); ?>>
<head>

    <?php
        // ipAddCss('Ip/Internal/Core/assets/ipContent/ipContent.css'); // include default CSS for widgets
        ipAddCss('assets/style.css');
        echo ipHead();
    ?>
</head>
<body>
Here, we call in the Doctype, as defined in
theme.json, and some variable provided by ImpressPages. Between the
<head>tags, we add our CSS file *.
echo ipHead();calls in the page’s information, such as the title, as well as several assets specific to the ImpressPages admin UI.
I have commented out the default CSS for widgets in this case because they conflict with the CSS framework I chose. Besides, you gotta make those widget styles match your branding anyway, right?
At the bottom of the page, you’ll want to put something like this:
    <?php
        ipAddJs('assets/modernizr.js');
        echo ipJs();
    ?>
</body>
</html>
You guessed it. We just called in a JavaScript file. And yes,
echo ipJs();calls in the JS files that make the Admin UI work once you’ve logged in.
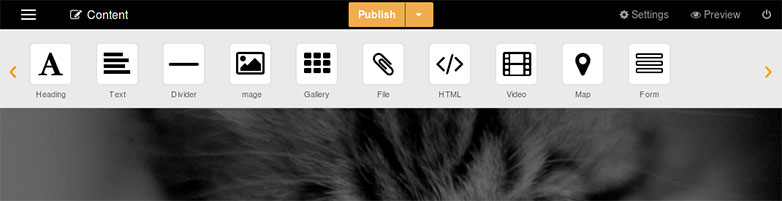
When all this is done, you should be seeing the main admin bar above your template, like so:
Note: The framework I used, Base, is built with LESS. There are a fair few LESS files in the template directory, but I only need to link to the final CSS file. This is fine for production.
During development, if you’re not using an external compiling app, you can actually have ImpressPages compile your LESS files for you, automatically. Here’s a guide to get you started.
Step five: Create editable regions for your content
HTML, CSS, and JS in place, it’s time to make all of the content editable. There are two functions for this:
ipSlot();and
ipBlock();.
ipSlot();can be used to place single lines of text, wrapped in whatever HTML element you might like. Additionally, it can generate menus, breadcrumb navigation, a language picker, or display the site logo. (You can also customize it to display other things, but that takes actual programming skill.)
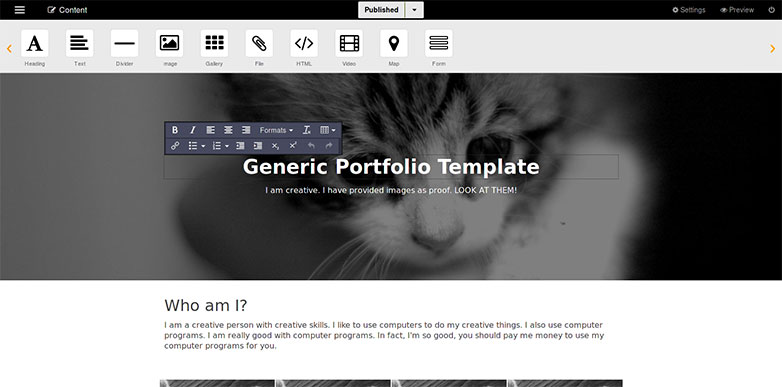
In the code example below, you’ll see that I’ve used it to display the site’s name in a general text field, as well as the site slogan:
    <header id="pageheader">
        <div class="filter">
              <div class="container">
                  <div class="row clear">
                      <div class="col col-12">
            <?php echo ipSlot('text', array('id' => 'DemoTitle', 'tag' => 'h1',
    'default' => 'Generic Portfolio Template')); ?>
                        <?php echo ipSlot('text', array('id' => 'DemoSlogan', 'tag' => 'p',
    'default' => 'Put your slogan here.')); ?>
                    </div>
                  </div>
              </div>
        </div>
   </header>
And here’s how it looks:
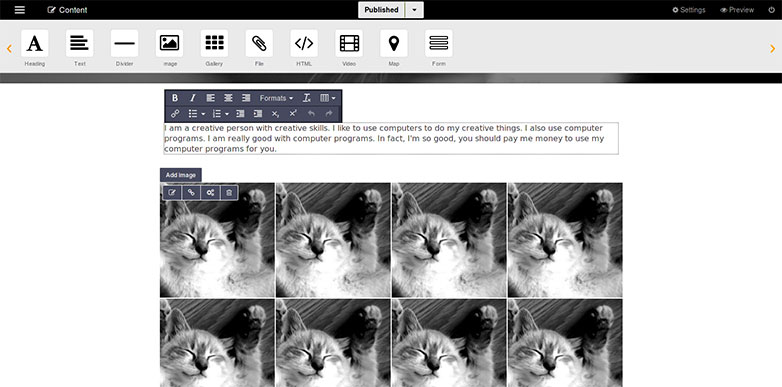
ipBlock();creates a general-purpose area where any of ImpressPages’ widgets can be displayed. There are plenty of options you can define when you call it up in your template, but general usage will look something like this:
   <section id="portfolio">
       <div class="container">
           <div class="row clear">
               <div id="intro" class="col col-12">
                    <?php echo ipBlock('intro')->exampleContent(''); ?>
               </div>
           </div>
           <div class="row clear">
                <?php echo ipBlock('gallery')->exampleContent(''); ?>
           </div>
       </div>
   </section>
I used two of the functions here, one for the introductory text, and the other for the image gallery. That said, you can add any number of widgets to either section. Here’s what they look like from the admin side of things:
Let’s wrap it up
As you can see, ImpressPages is impressive, and flexible. You can use it as a fully-fledged framework, with all of the complicated stuff that entails. It’s also easy enough for front-end coders like myself to get started building websites with it.
If you’re not happy with the default selection of widgets, you can always download more (and themes too) right within ImpressPages.
If you want to learn more about making your own themes, check out their documentation.
Try it out, let us know what you think. Could ImpressPages be the next CMS to grace your toolbox?